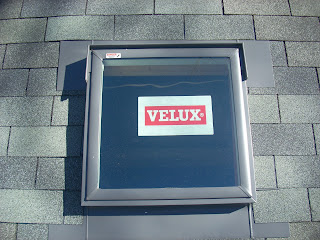
Step 1 was to figure out whether I could make it work. It isn't easy to look at an interior space to see where a skylight needs to go, then translate that to a spot on the roof to see whether it can actually go there. The roof concern was whether I would be attempting to put a skylight at the point where the roof changes pitch. I have never seen a hinged one.
Step 2 was to order Velox's smallest skylight in the style we got for our bedroom. I wanted small because this is a small space and the skylight will get some afternoon sun. The one I got is still plenty big: about 20" x 20".
Step 3 was to do more thinking. I needed to place the skylight high on the roof (i.e. towards the hallway side of the bathroom) to avoid the lower-pitched part of the roof. How high was limited by support running perpendicular to the rafters and by the need to actually have the skylight over the bathroom and not the hallway. I also wanted the light shaft to be close to vertical on the hallway and living room sides to that the aforementioned afternoon sun reflects off the light shaft instead of beating on the floor. Finally the other two sides of the light shaft needed to open wide to spread the light over the sinks and into the back chamber.
I picked up the skylight this week and started the interior construction last night.
 |
| This is the starting point. I took this picture from the floor with my feet towards the door. |
 |
| Three hours later. |
Doing the interior rough-in last night put me in a position to enjoy a beautiful morning outside.
 |
| First clear a space around the nails poked from the inside. |
 |
| Have to go through the tar paper, too. |
 |
| Rough hole so I can see where the exact edges need to be. Notice the new toy. |
 |
| Skylight positioned over squared up hole. |
 |
| And now it looks like it has been there forever. Except for the sticker. |
 |
| Good grief! Who put all that stuff on the roof! |
 |
| That's better. |
After a very late lunch I did the one other nice touch. This is the wall over the doorway to the loo chamber:
And this is the same doorway framed for a glassed opening so some of that nice daylight will be available for potty reading.


What a great idea! Love it! We love the surprise!
ReplyDeleteBTW, I love the transom in the interior doorway. Great idea. I love those!
ReplyDelete